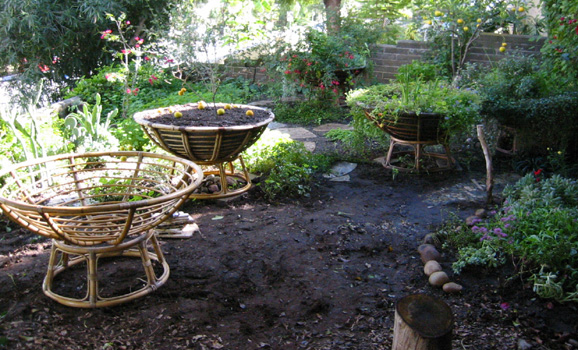
In this first photo you can see the three phases of the planter: bare
frame, loaded with earth, and planted.
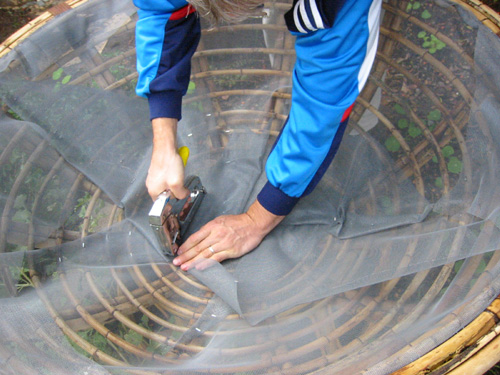
In the second
photo I have begun stapling nylon screen to the inside of the frame, starting
with the lip. The screen is standard material for screen doors and comes
in rolls of different widths. The staples are 1/2" steel.
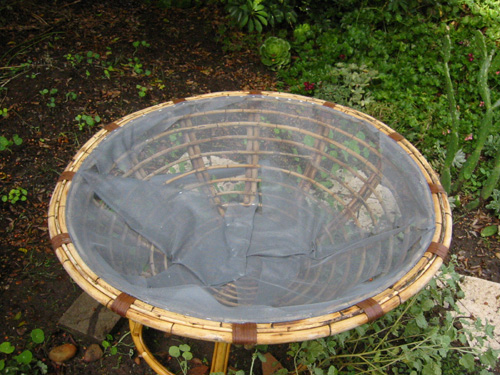
Leaving the piece of screen intact, I simply fold it and staple it to
the rattan frame. I don't worry about assymetry, I just want it to be
flat and secure, and to be invisible at the edge.

Étape 1: Tapisser la structure
Étape 2: Remplir de terreau
Étape 3: Planter!
Dans la photo ci-contre, on peut observer les trois étapes de la réalisation de la jardinière: la structure vide, puis garnie de terreau, et enfin plantée.
Seconde photo:
une trame en nylon est agrafée aux montants de bois, en commençant
par la périphérie. La trame que j'ai utilisée est
un matériau utilisé pour les portes-paravents et est disponible
en différentes largeurs. J'ai utilisé de grosses agrafes
de 1,3 cm.
Afin de garder
la trame de nylon intacte, je l'ai simplement repliée puis agrafée
aux montants en osier. L'asymétrie n'est pas gênante, l'important
est que la trame soit bien en place et à plat, et surtout invisible
de l'extérieur.